Getting Started with the Flows for APEX App
Getting Started using the FlowsforAPEX Application
-
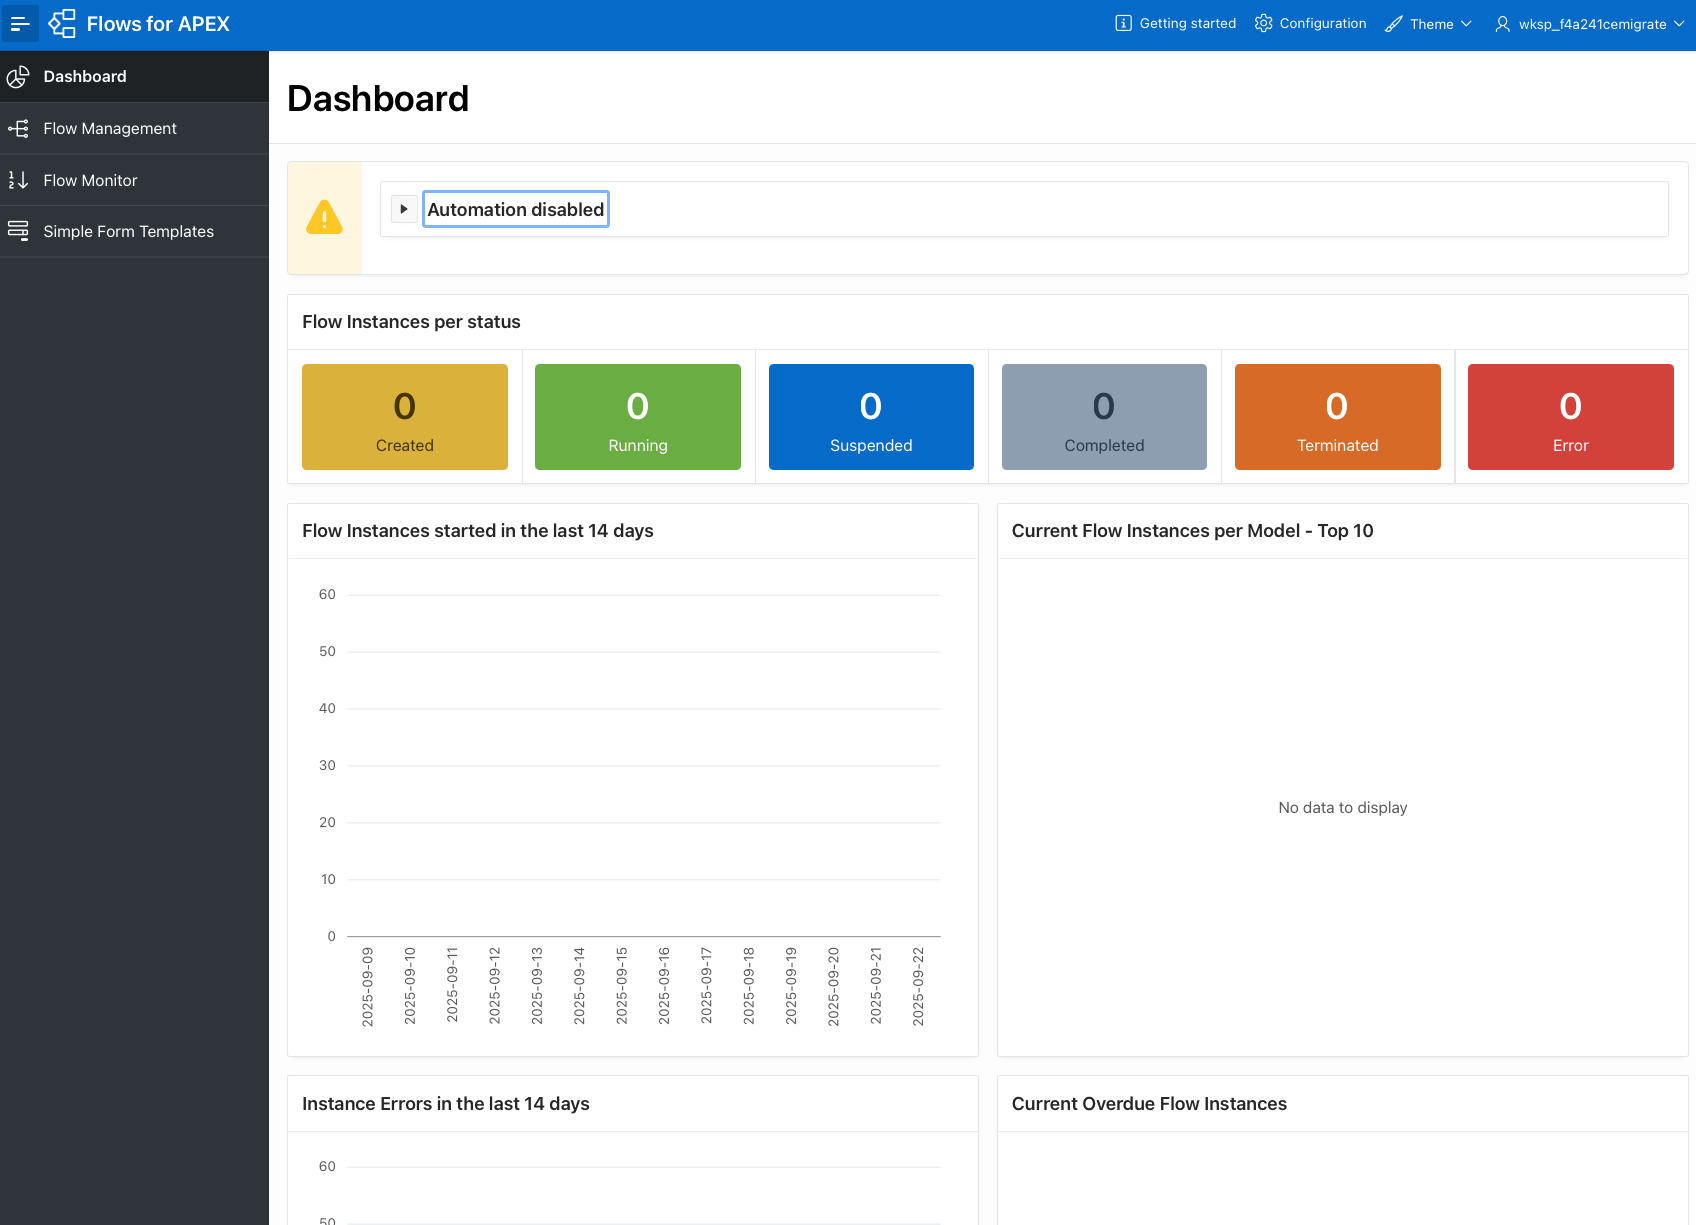
Open the Flows for APEX Application. You will see the Dashboard showing you information about any process instances.
-
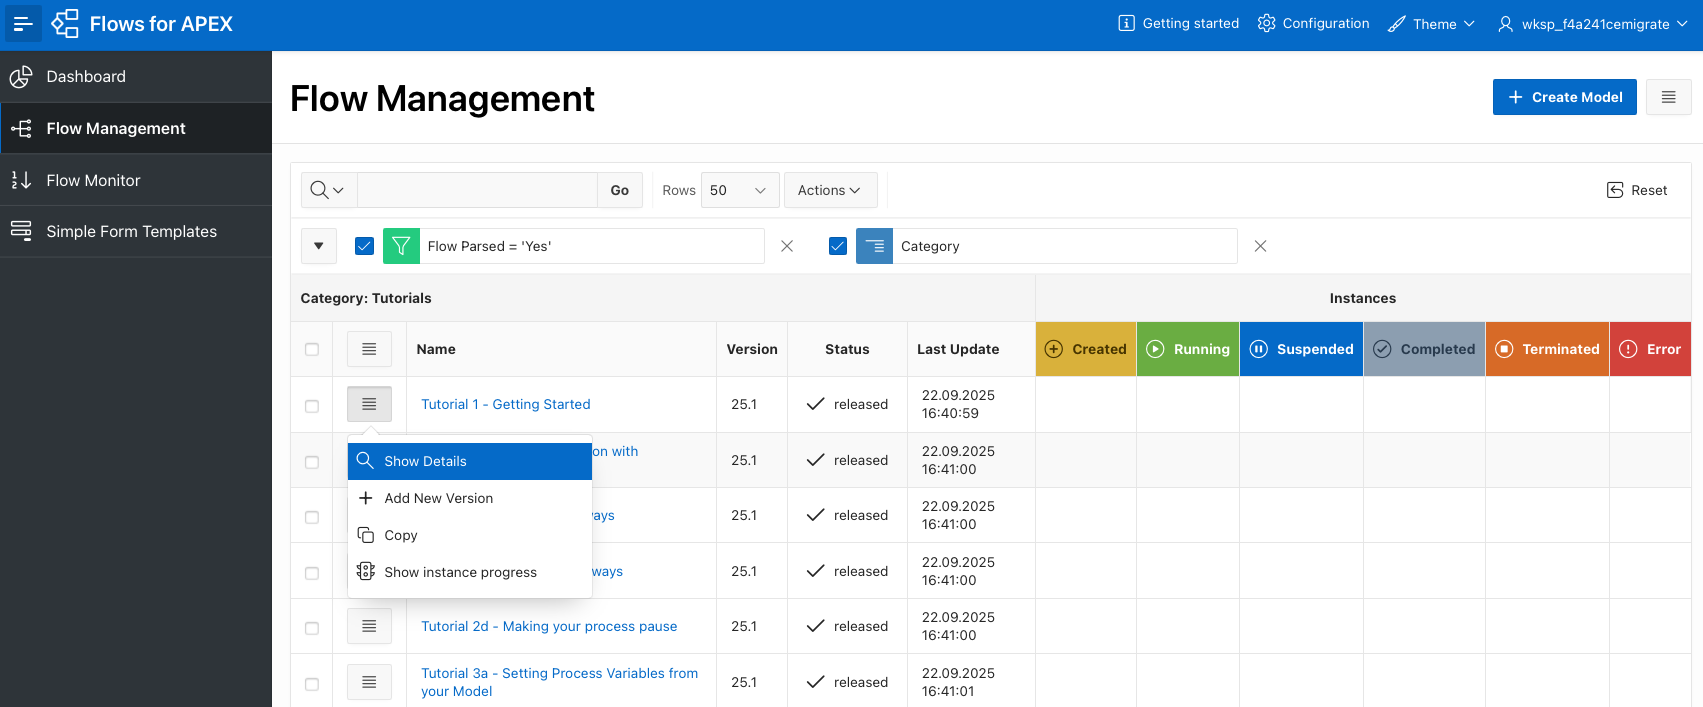
Start off in the Flow Management tab. Select this from the APEX Navigation Menu on the Left.
-
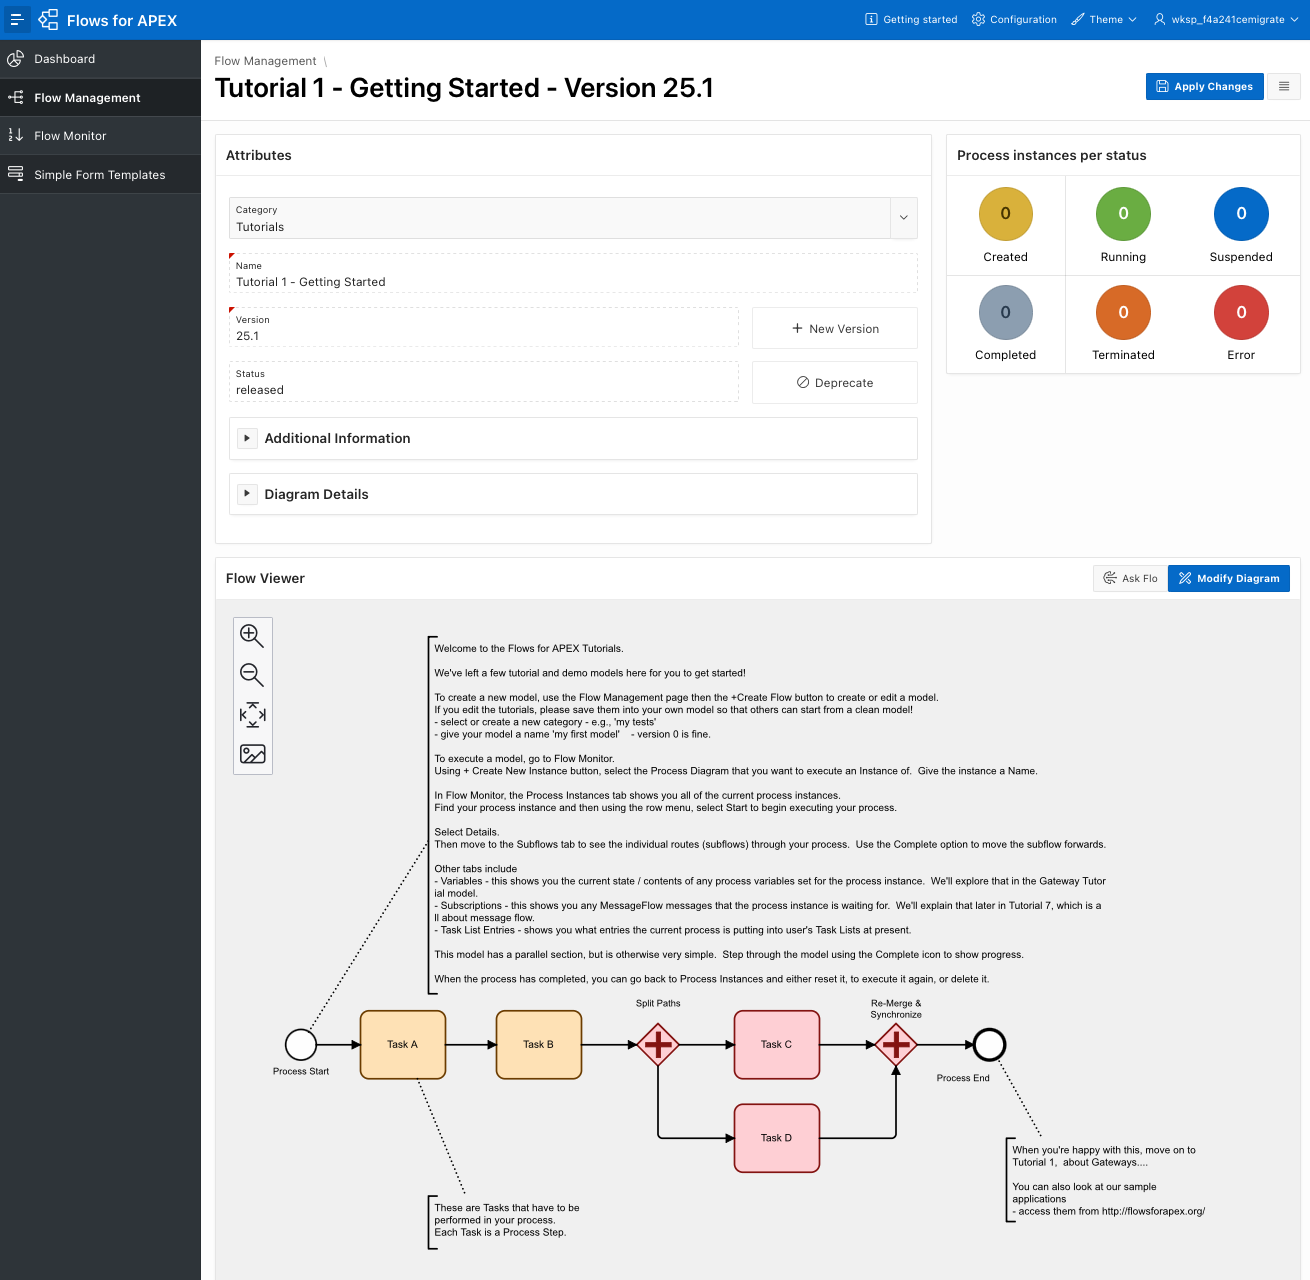
Find the ‘Tutorial 1 - Getting Started’ model, and then on the row menu select Show Details to see information about the Tutorial 1 process model.
-
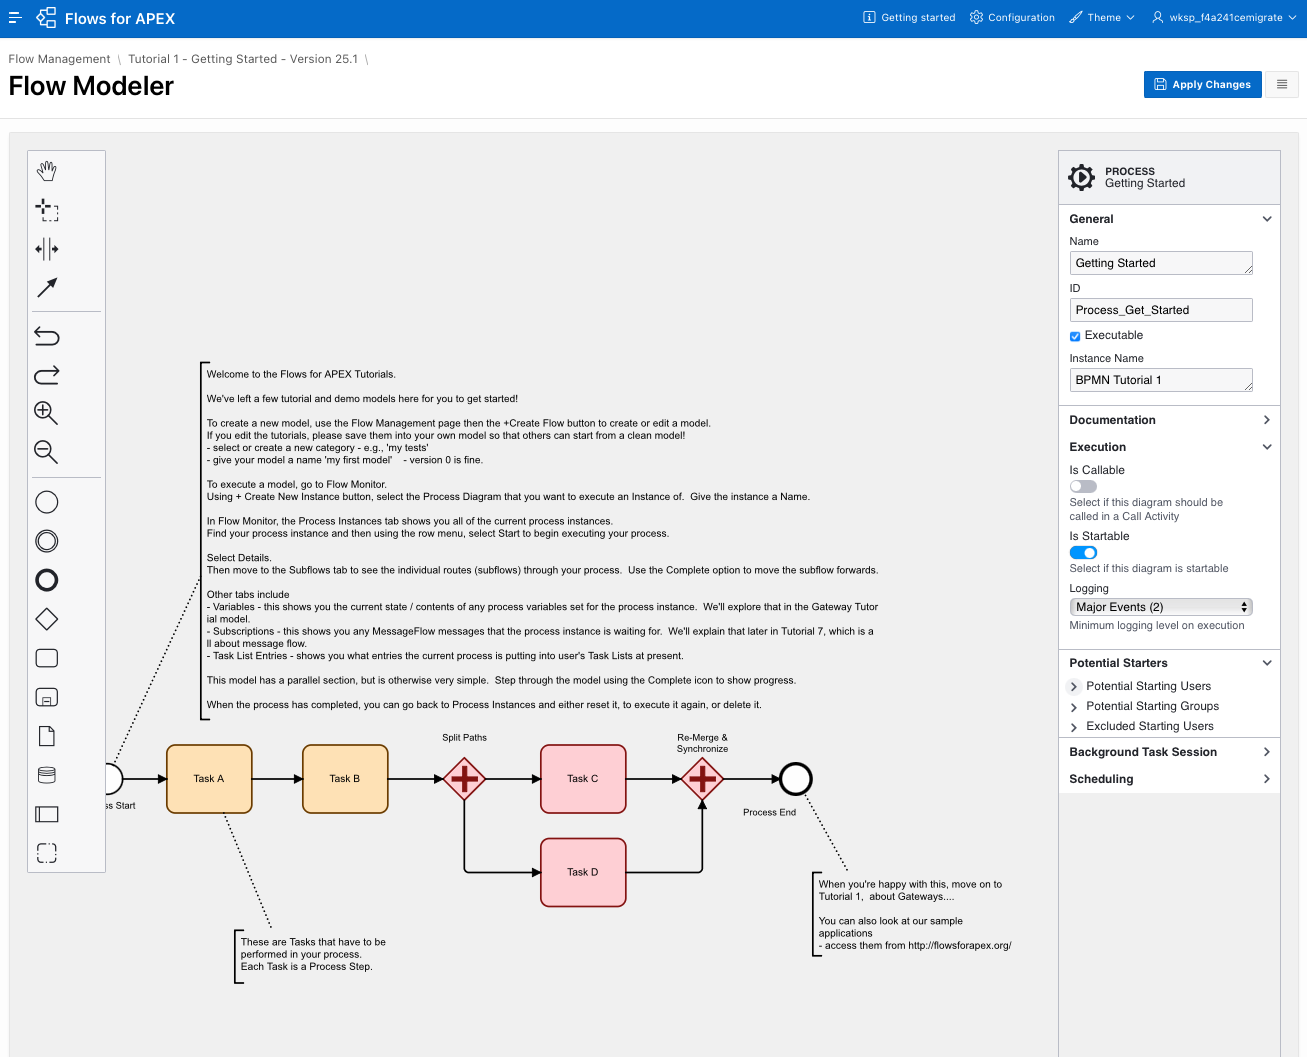
Click on Modify Diagram button to open the Modeler.
-
Read the model text. Use the Properties Panel on the Right Hand Side if you want to see the detailed configurations.
-
If you have edited the model & want to execute it, use the Apply Changes icon to save them. This saves the BPMN model as an XML object into the database, and creates a parsed copy of it in the Flows for APEX tables ready for execution. If you want to make a copy with your own changes, you should make a copy in the Flow Management Detail page (the previous page you were on), make your changes, and save them.
-
Go to the Flow Monitor tab using the APEX Navigation Menu on the Left.
-
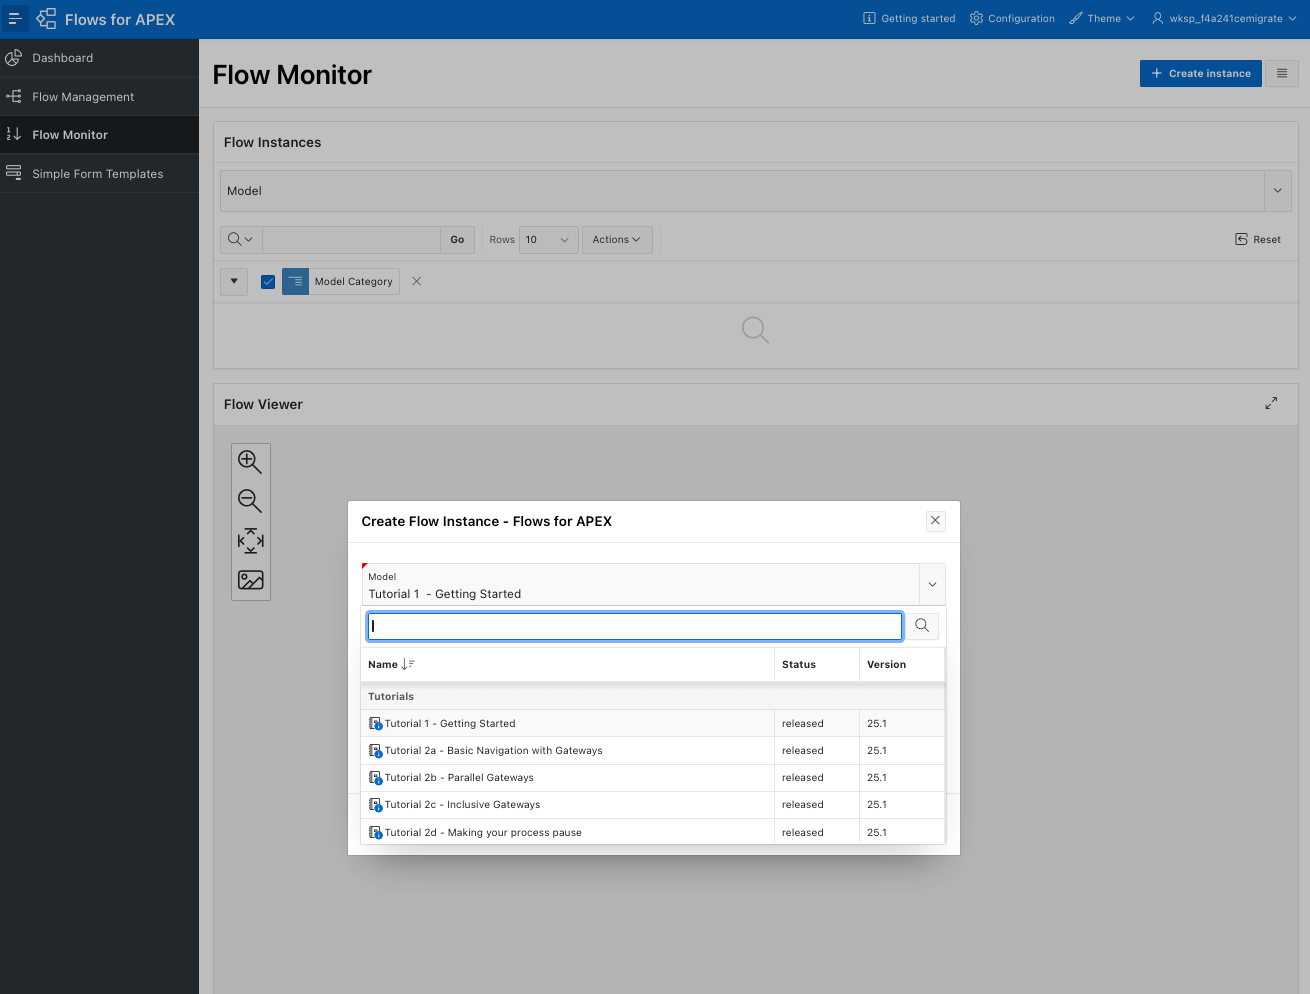
From the Flow Monitor, click the + Create Instance button (Top Right), select your process from the pull-down menu, and give the process instance some name. Don’t worry for now, but you can optionally enter a Business Reference here if your process needs a Primary Key to a subject record. You can also override the logging levels set for the diagram if you want to have more logging for debugging purposes, for example. You can leave these 2 items empty. Click Create.
-
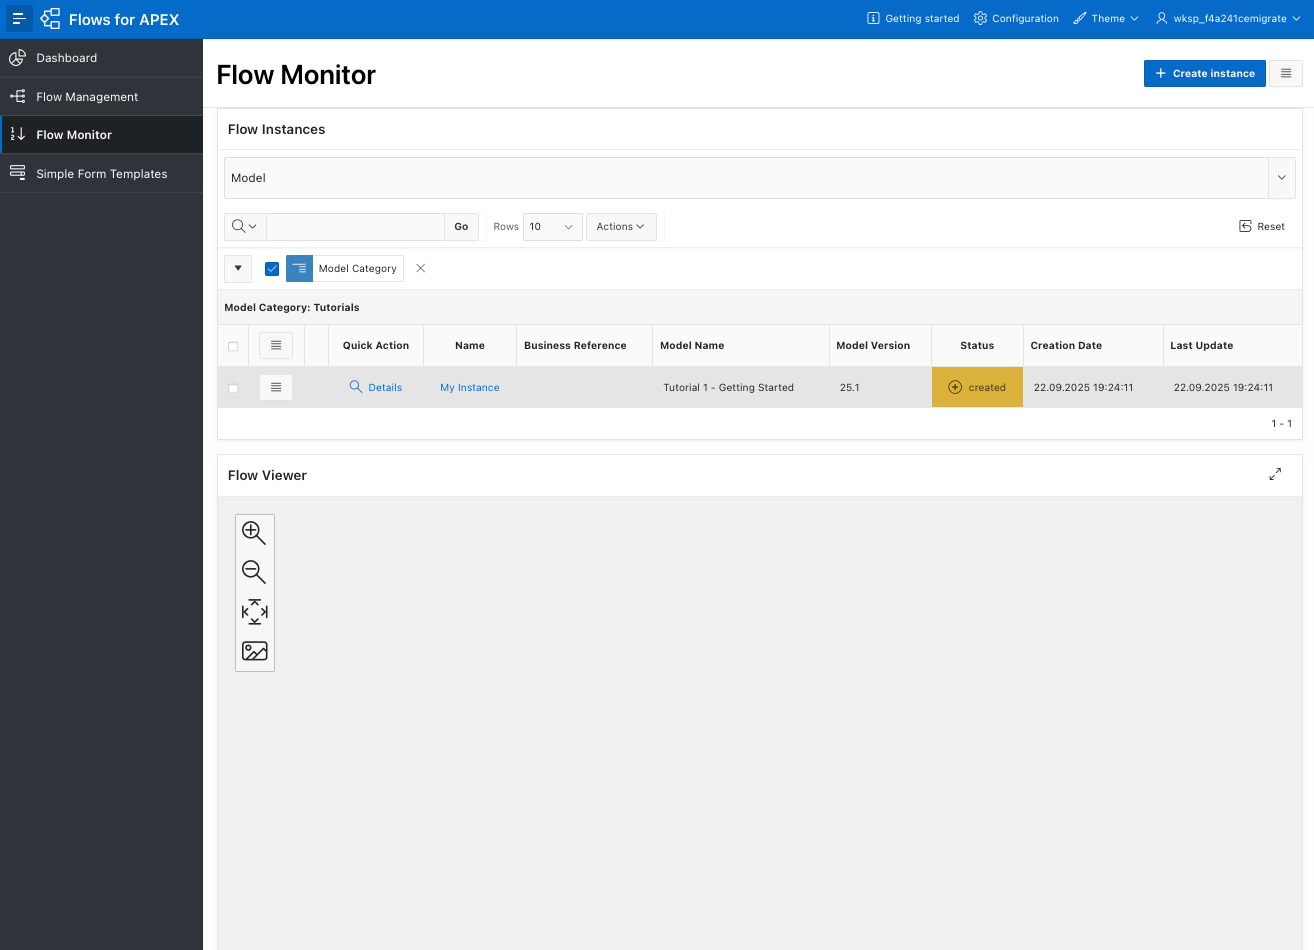
In the Flow Monitor , in the Flow Instances region, you’ll see that your process instance is now listed with a status or created.
-
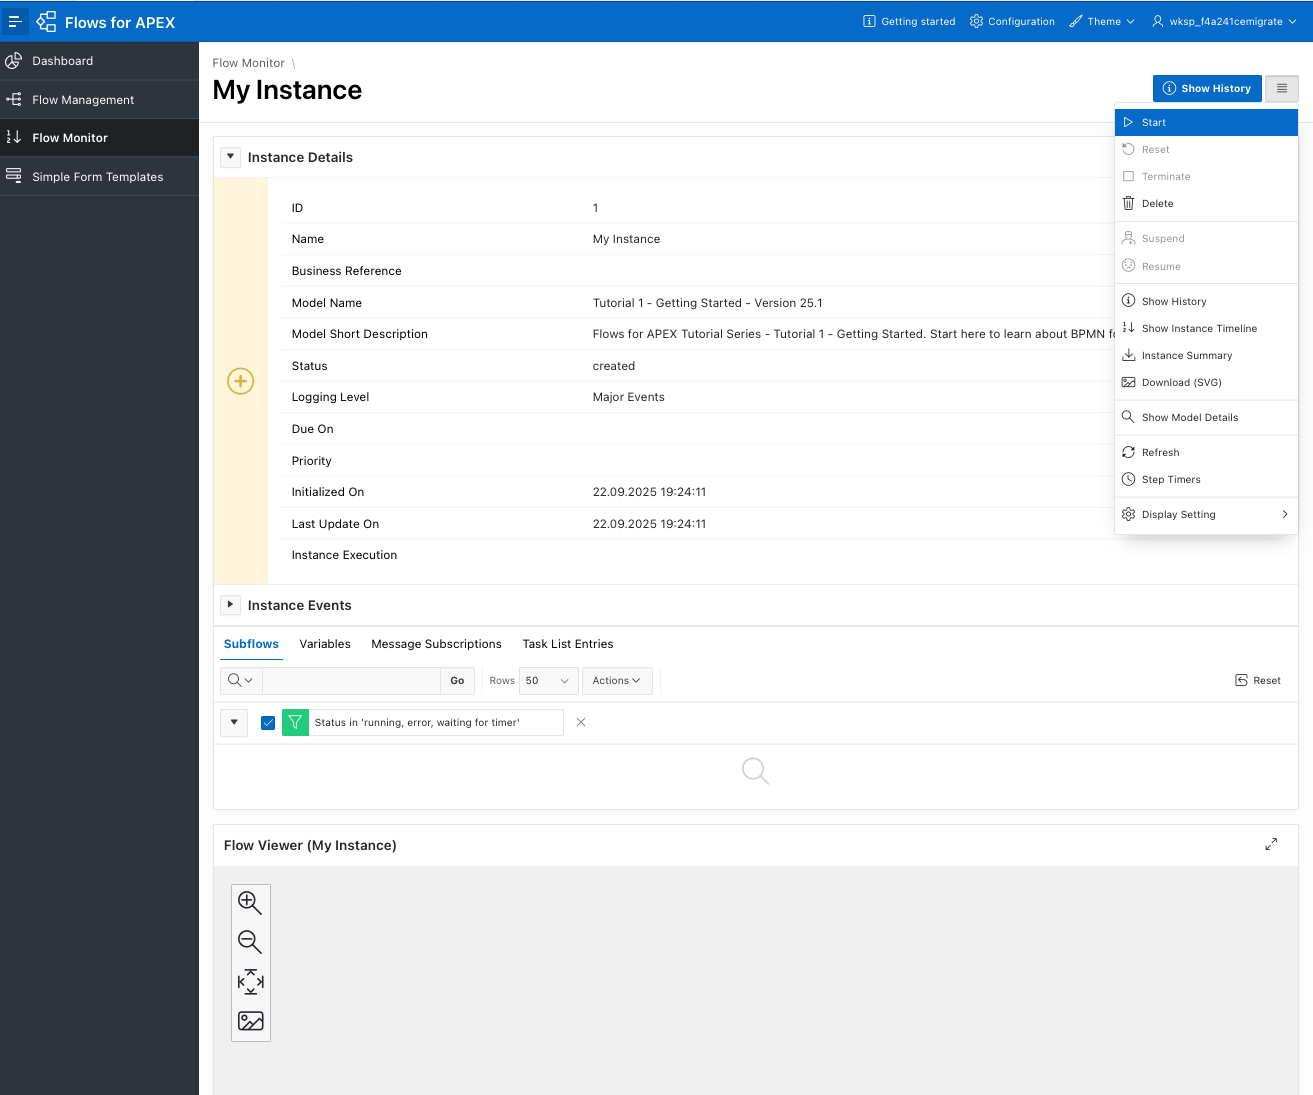
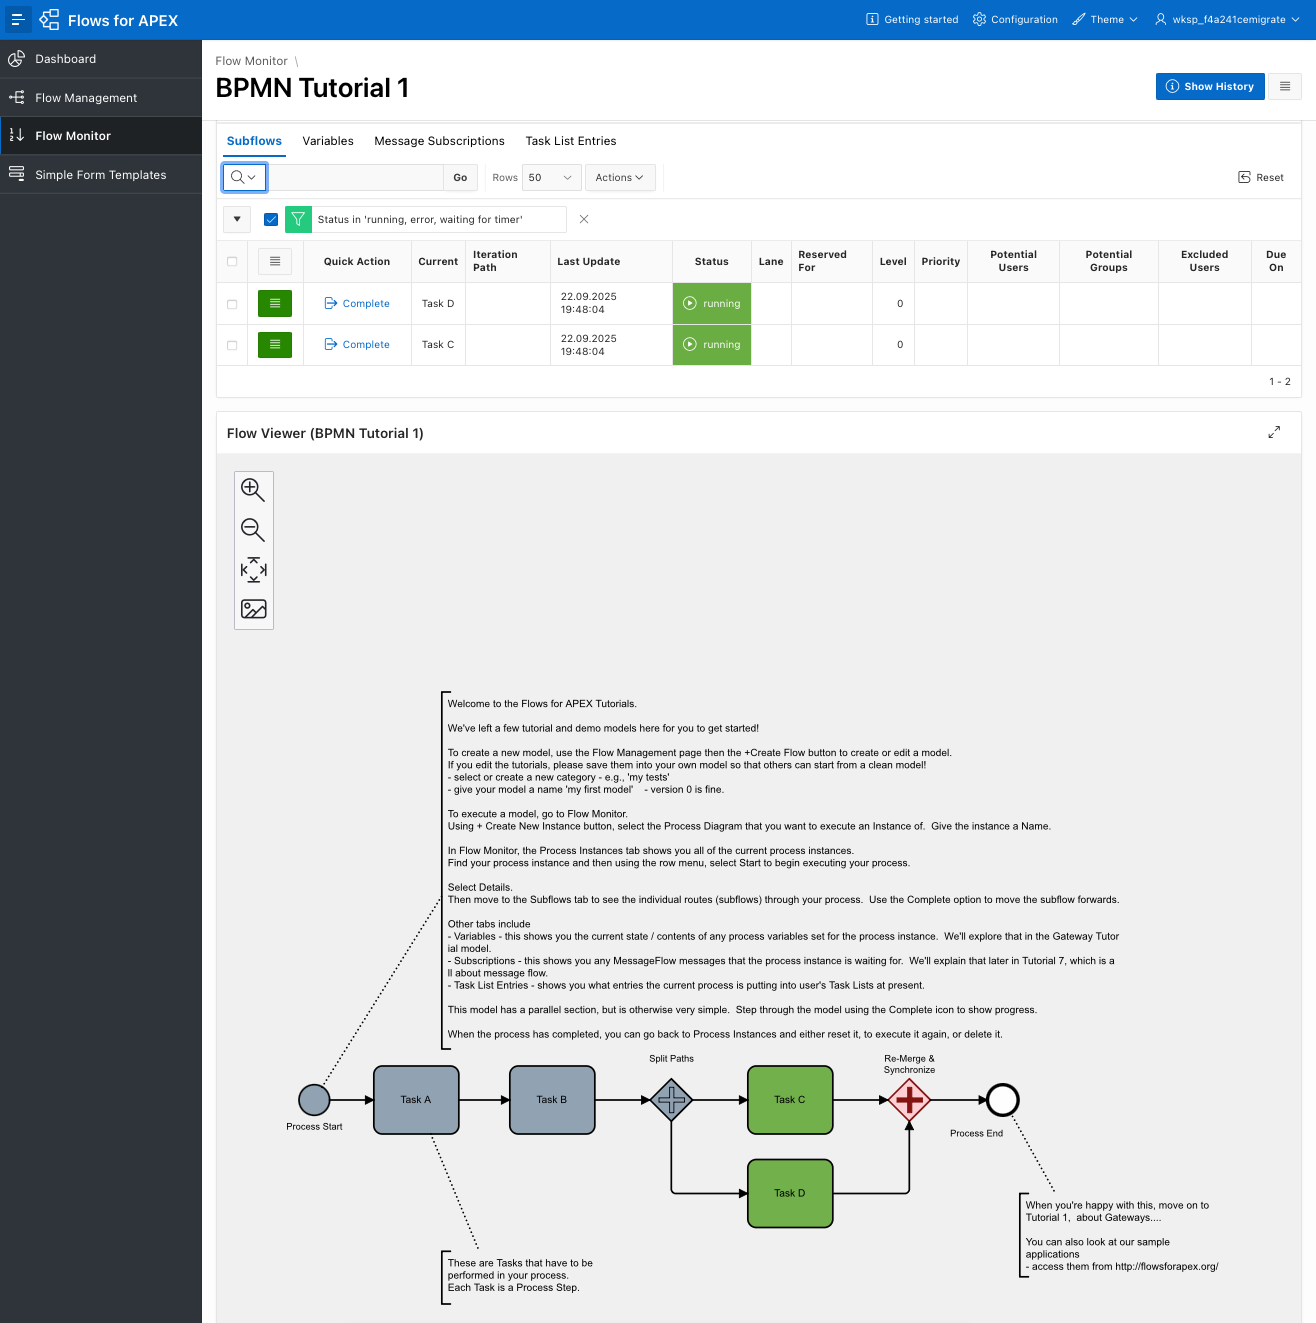
Click on the Details Quick Action for your pocess instance. This will take you into the Instance Details page. This has four main regions.
The top region, Instance Details shows you information about the process instance.
Below that, and closed by default, is the Instance Events region - which shows the log records for the process instance.
The middle region is a carosel, which can show you:
- Subflows - shows you each of the active paths through the process. As it is not yet started, there are none - but there will be!
- Variables - shows you the current contents of any process variables. that have been set. Process Variables in Flows for APEX are created as they are set - so there might not be any at the start of your process. The Business Ref that we discussd earlier is a process variable.
- Message Subscriptions - shows details of any messages that your process is currently waiting for. There won’t be any of these unless one or more of yiour subflows is currently waiting for a message to proceed.
- Task List Entries - if te current step on a subflow is a User Task, which will appear in a user’s task list until it is completed, you will be able to to see the task list entry here in the admin console.
The bottom region is a Flow Viewer, whowing you the current state of the instance. Current steps are shown in GREEN. Completed steps in GREY, and errored steps in RED.
-
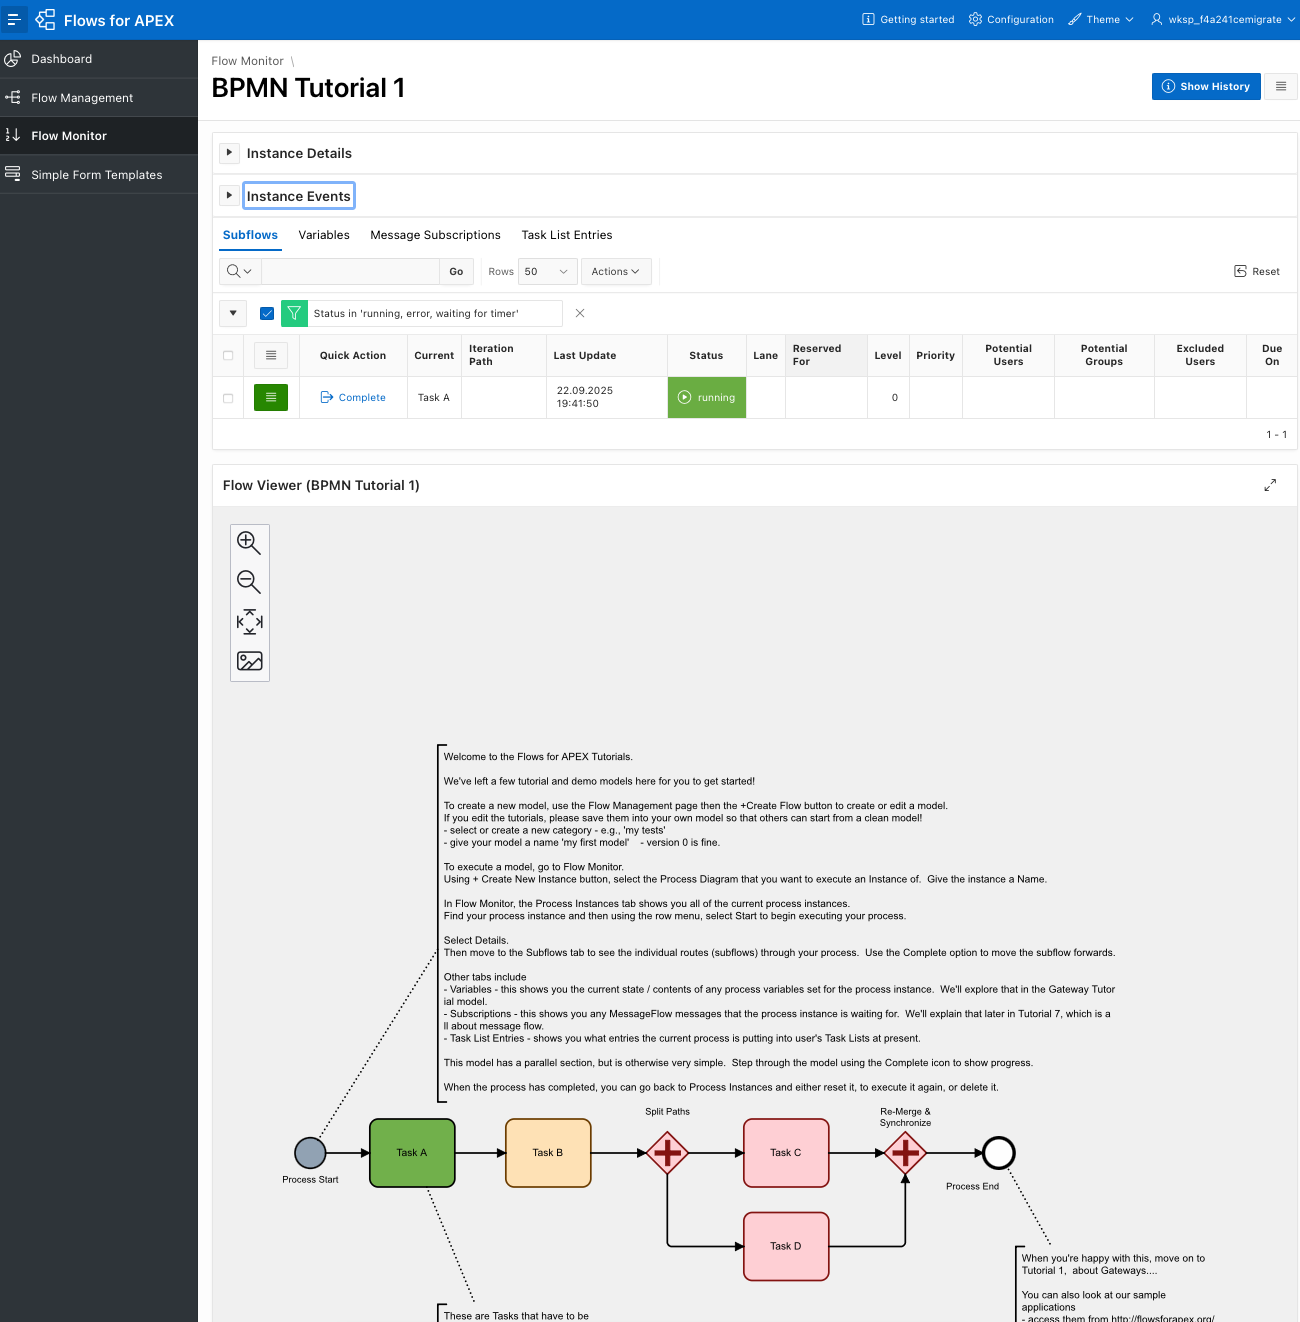
Click the Start item from the top right hamburger menu to start executing the process flow. Notice a copy of your process diagram appears in the Flow Monitor region at. the bottom of your screen.
If you have a large or wide-screen monitor, you can have Flows for APEX display the Flow Viewer side-by-side with the tabular details of the instance execution. To do this, select the hamburger menu on the top right next to +Create Instance. Select Display Setting, followed by side-by-side for a wide monitor or new window if you have multiple monitors.
-
In the Flow Monitor carousel, now select the Subflows tab. You will see the execution subflows within your process instance. Use the ‘Complete’ button to move the process forward to the next process state. Notice the progress of your flow in the Flow Monitor. The Current Task(s) are shown in Green, completed tasks are shaded Grey.
-
Step through your Model until it completes by clicking Complete on each step. Notice that after passing the Parallel Gateway ( ), you will have two subflows running for Task C and Task D. Once Task C and Task D are completed, the workflow will move forwards to the Process End. Note then that there are no subflows still running.
If you wish to re-run the model, you can return to the Flow Instances tab, and click the ‘Reset’ button to restart your process. Note that this is not something you would do with a production process - you’d run a new instance of the process - but it’s useful for debugging and as you learn how Flows for APEX works.
Next Steps
Now you’ve got the basics of how to build a process model using BPMN for Flows for APEX, take a look at our sample application “Expense Claims”. This uses an example business process of how a company might handle expense claims submitted by their employees. The sample app is part of the software distribution and can be installed by importing the app. A shared cloud version of the app is available here.