Add a Process Viewer Page
Add a Workflow Viewer to Your App
One major advantage of Flows for APEX is the ability to see the workflow state graphically and we provide a plug-in and a view to make it easier.
-
Create a new plug-in page. In the Application Builder, click Create Page and select Plug-in Page.

-
Select Flows for APEX - Viewer and click on Next.

-
Set the Page Name to Workflow Viewer, make sure the selected Page Mode is Drawer. Set the Data Source to be the FLOW_VIEWER_VW and click on Next.

-
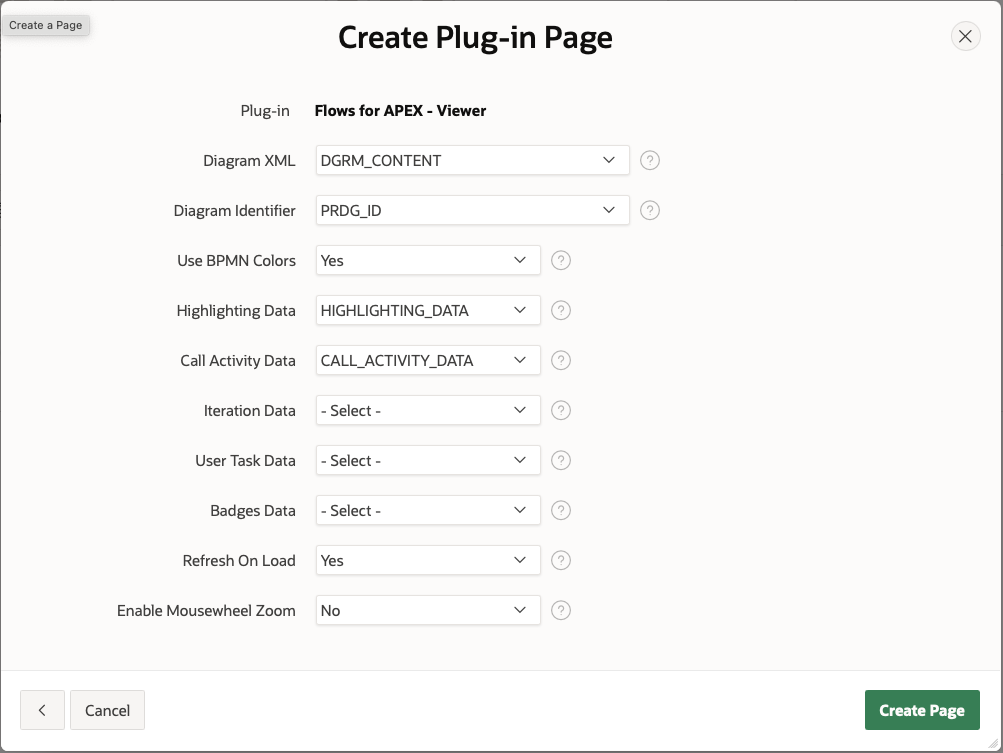
Change the attributes Add Highlighting to Yes and select the Highlighting Data. Enable Use BPMN Colors to show any coloring that has been added to the diagram. Select the Call Activity Data (see screenshot) and click on Create Page.
-
Add an APEX page item on the Viewer region:
- Identification:
- Name: P3_PRCS_ID
- Type: Hidden
- Identification:

- Select the region Workflow Viewer and under Source/Where Clause add:
prcs_id = :P3_PRCS_ID

Add the Link to the Calling Page
-
Edit the page you want to link the Viewer into. In our example, the page we’re adding the Viewer into is Page 1, which already has a column containing Process ID.
- On the Column containing Process ID
- Identification:
- Type: Link
- Heading:
- Heading: “-“
- Link:
- Target:
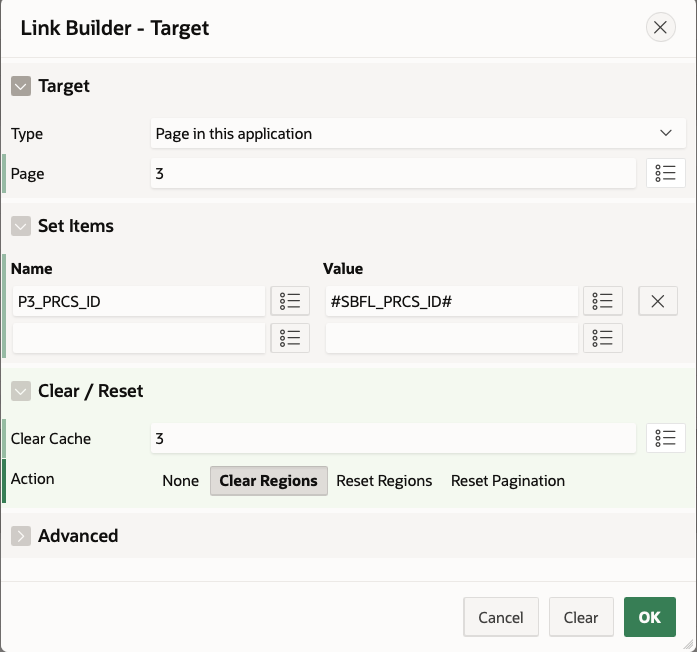
- Link Text:
<span class="fa fa-search" aria-hidden="true"></span>
- Target:
- Identification:
- Column SBFL_PROCESS_NAME
- Heading:
- Heading: Instance Name
- Heading:
- Column SBFL_PRCS_INIT_TS
- Heading:
- Heading: Init Date
- Heading:
- Column SBFL_CURRENT_NAME
- Heading:
- Heading: Current Task
- Heading:
- Column SBFL_STATUS
- Heading:
- Heading: Status
- Heading:
- On the Column containing Process ID
Save and Run the page, you should now be able to click on the link and see your instance state in the Viewer!
